background

Friday, December 30, 2011

christmas dinner


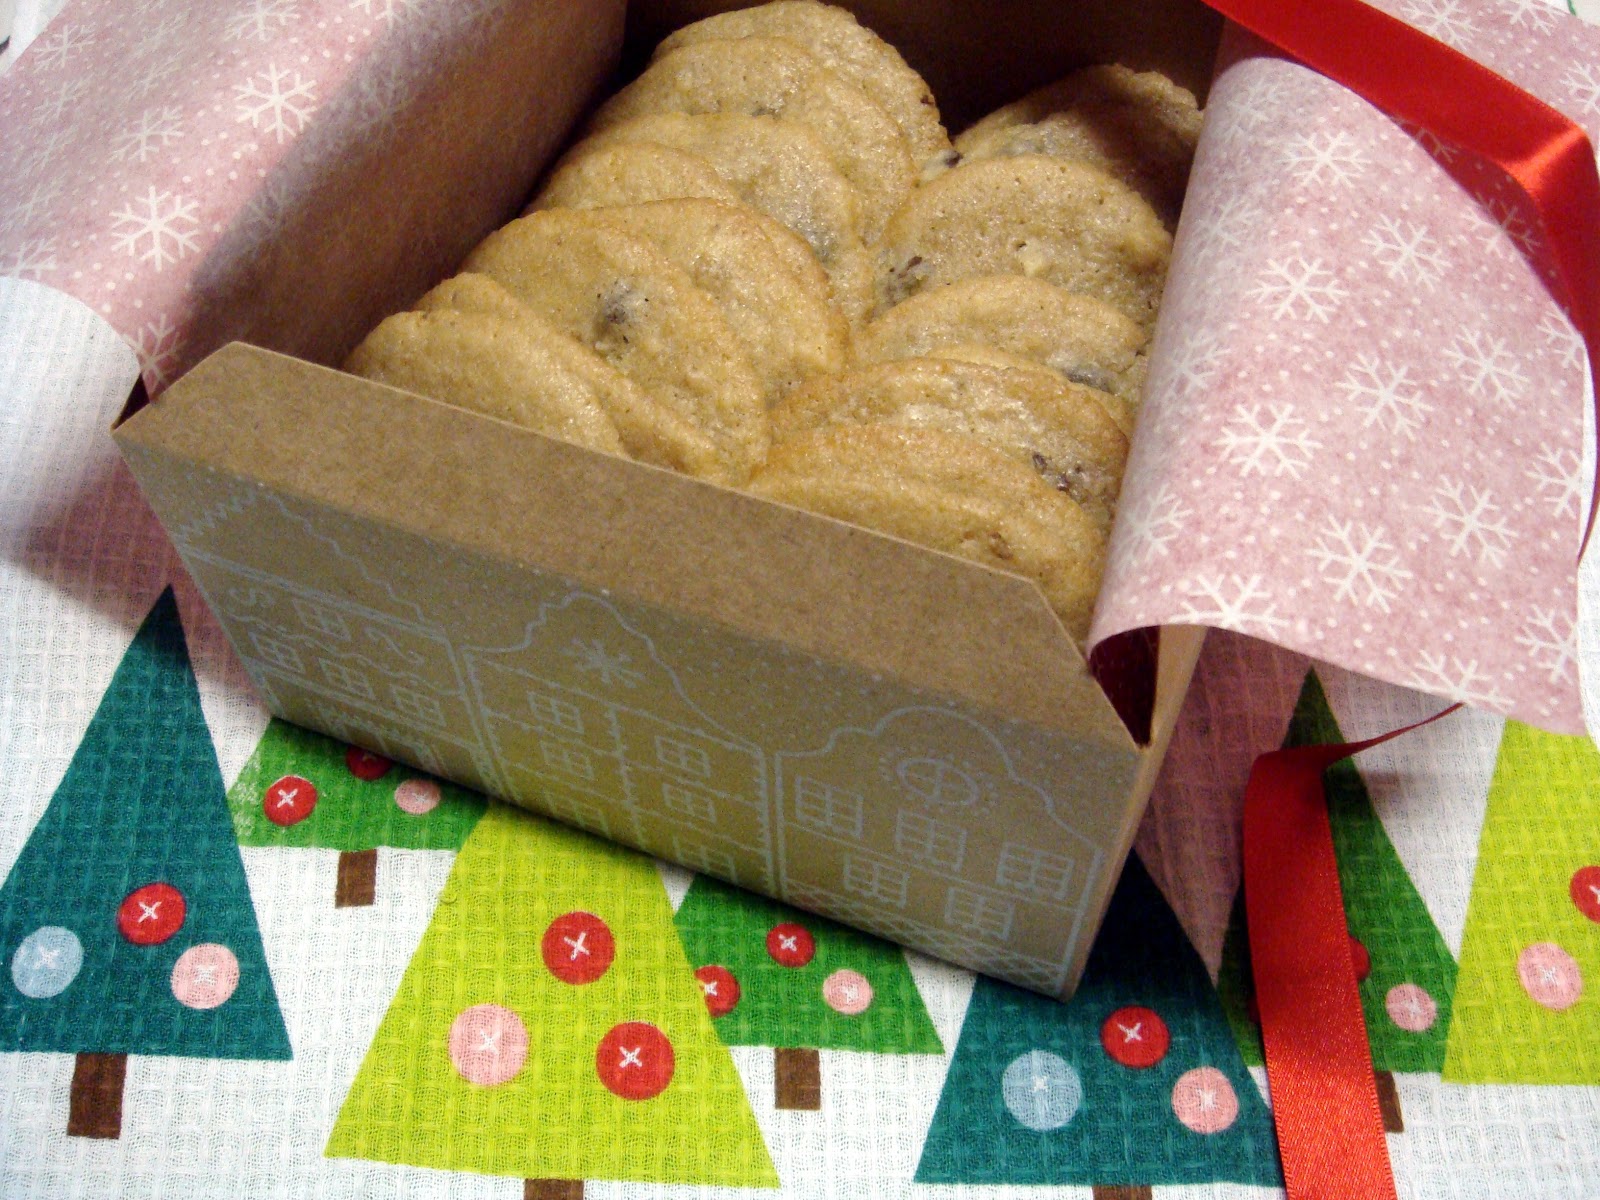
I hope everyone had a wonderful Christmas. I had a nice and quiet family dinner, only made special by our menu and presents. No, we did not start with dessert, but I couldn't help but start this post with a picture of it. I'm starting to love the way desserts look served in a glass, simple yet elegant.


So I started cooking dinner by roasting a medley of vegetables scented with smashed garlic and sage leaves. The Brussels sprouts and potatoes are always a crowd-pleaser during the holiday meals, so I figured why not combine both dishes into one and add some carrots for extra color and flavor. Worked out very well, but remember not to overcrowd the pan, or else the veggies won't brown well.


I started to include a rice dish in our holiday meals last year, because my brother's girlfriend doesn't eat meat, so she needs a carb dish to satisfy her stomach. I changed it up by making a roasted butternut squash risotto. I never had to prep a butternut squash before, so let me warn you that the flesh is very hard and you need to be careful when peeling it. I cut the end off and cut right across the beginning of the bulb, that way you have a flat platform to peel and dice.


And the piece de resistance...horseradish crusted prime rib. I tried a new recipe this year, courtesy of Tyler Florence and Food Network. It was a beautiful medium rare, juicy, and flavorful rack of meat. My only complaint was that the crust was beyond salty and even the outer areas of beef were quite salty. The horseradish was completely lost in the sodium laden crust, practically defeating its entire existence. But thank goodness the prime rib was still tasty once you cut off the crust.


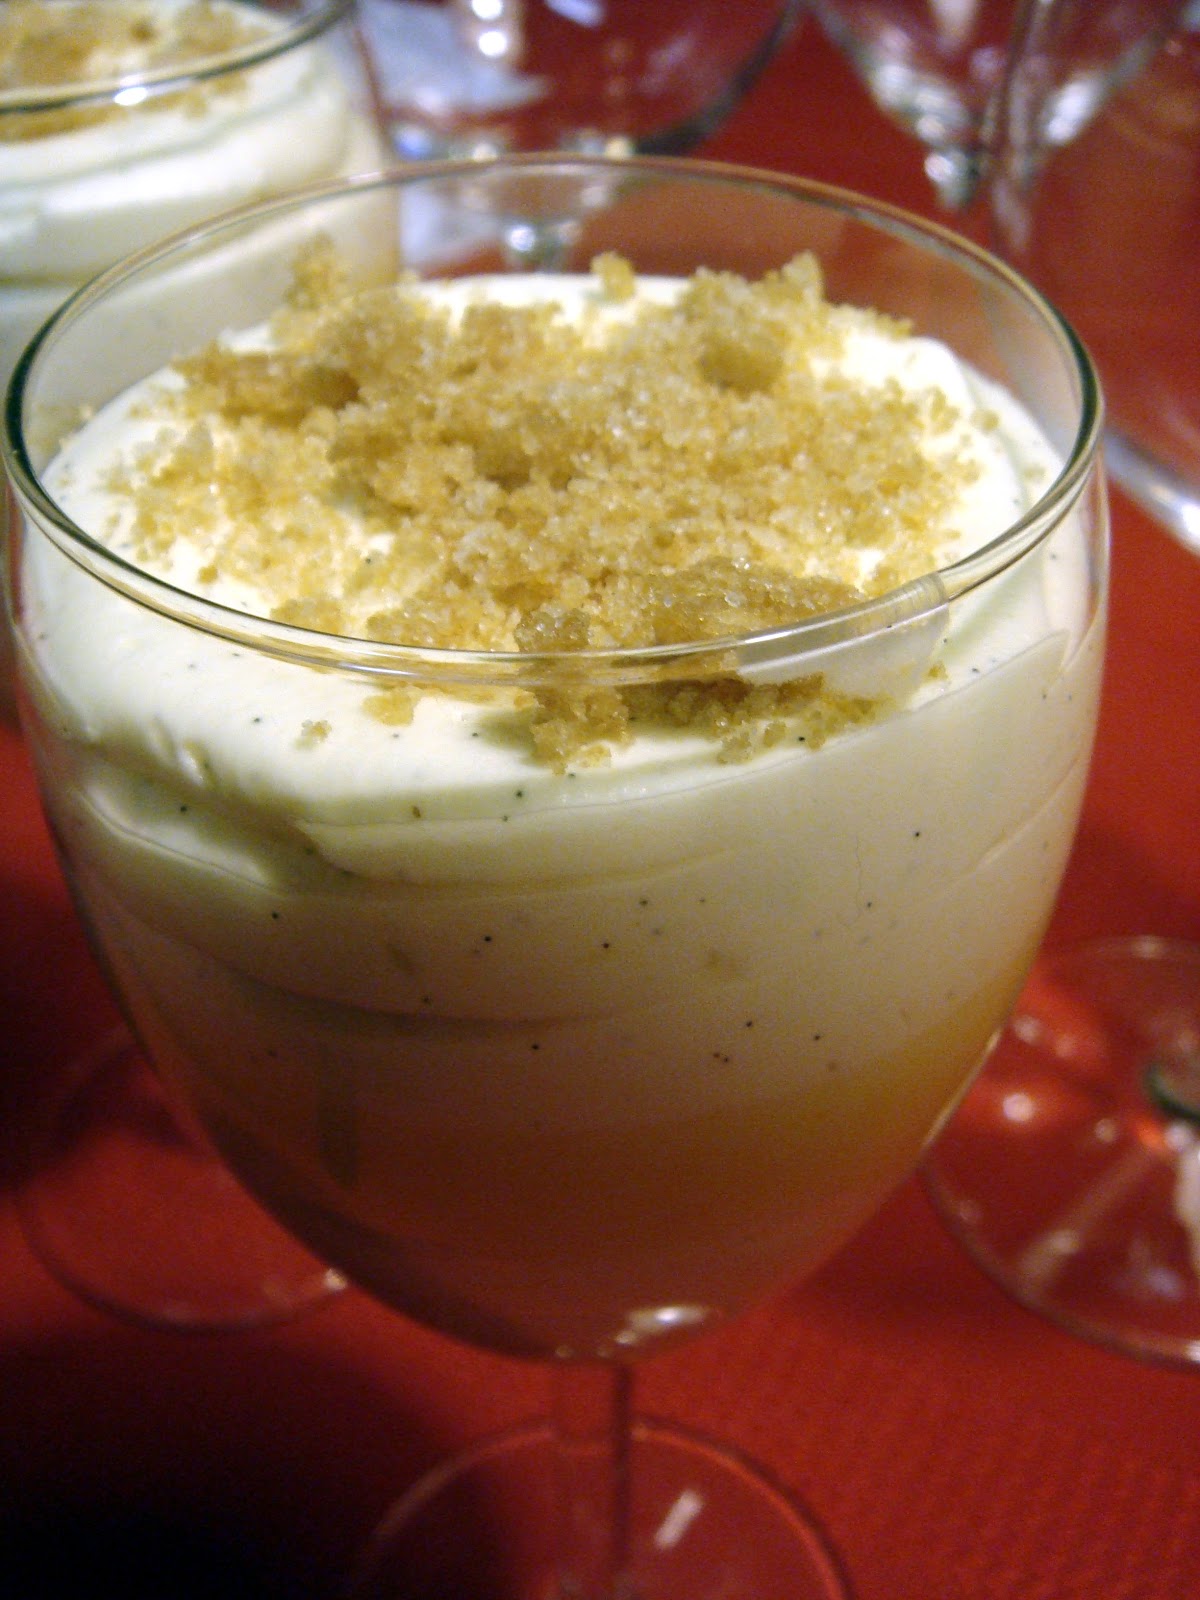
Dessert? Well that was a lemon curd with vanilla bean and cardamom mousse verrine. I didn't have any meyer lemons, so I used a combination of lemon juice/zest and orange juice/zest. As for the mousse, I substituted half a teaspoon of ground cardamom in place of the pods. To add texture, I added the crumble topping from my blueberry muffins. Just spread the crumble on a baking sheet and bake for about 10 minutes, just until golden.

And how do you know if dinner was a success? When you see this...


This will be my last post for 2011. Have a Happy New Year, everyone!

Saturday, December 24, 2011

chocolate chip cookies and christmas eve


Happy Christmas Eve everyone! Thought I would make my final Christmas cookies post before I start cooking for Christmas dinner tonight (our family celebrates on the night of the Eve with dinner and presents). With all the cookies lately, I decided to wrap it up with a classic, chocolate chip cookies.


I made a slight adjustment and added chopped toasted walnuts for texture, and for A. since she loves nutty cookies. These were extra chewy and soft, ideal to wrap up the weeks of Christmas cookies. Even her coworker Al. thanked me for them, so I'm sure chocolate chip cookies have a special place in all of our hearts. The big box went to her office, and I packaged a small take out box for Audgbodge along with her Christmas craft. Coincidentally, she's been craving for chocolate chip cookies, which made my choice perfect all around.

I wish everyone a very Merry Christmas and a wonderful holiday season with family and friends!

Chocolate Chip Cookies adapted from Martha Stewart

makes 3 dozen

2 1/4 cups AP flour
1/2 tsp baking soda
1 cup unsalted butter, room temperature
1/2 cup granulated sugar
1 cup packed light brown sugar
1 tsp salt
2 tsp vanilla extract
2 large eggs
1 cup semisweet chocolate chips
1 cup chopped walnuts, toasted

Preheat oven to 350. Sift together flour and baking soda in a bowl. Mix butter and sugars in the bowl of an electric mixer fitted with the paddle attachment on medium speed until pale and fluffy. Add salt, vanilla, and eggs and mix until well blended. Mix in flour mixture. Stir in chocolate chips and walnuts.

Using a 1 1/2-inch cookie scoop, scoop two scoops of dough to form one cookie. Drop onto parchment lined baking sheets, spacing 2 inches apart. Bake cookies, rotating halfway through, until edges turn golden brown but centers are still soft, about 12 minutes. Let cool on sheets on wire racks for 2 minutes. Transfer cookies to wire racks and let cool completely.

Friday, December 23, 2011

snickerdoodles and gifts


As much as this holiday season is about food for me, it is also about giving and sharing some of that food as a small token of holiday cheer. I've always given some of the baked goods from my oven away, saving myself in part from high calories. Especially now though, I make cookies just to share. My mom requested a batch for her coworkers the other day, and I couldn't help but fill my house with the warm smell of cinnamon sugar.


Can you believe I've never had a snickerdoodle before I made this recipe? I know, I know, how is that even possible, considering it is just a sugar cookie with a cinnamon sugar crust. But I grew up in a pretty traditional Chinese household with minimal American snacks. And to be honest, snickerdoodles never quite interested me before, because I'm not a big fan of regular sugar cookies which are a bit sweet and plain for me.


But with all the baking with chocolate and nuts and spices, I thought this would be a nice change for simplicity while the flavor profile of cinnamon still kept it festive. They were better than I expected, with a crust from the cinnamon sugar giving way to a soft and chewy center. I wrapped them up two at a time separated by a piece of parchment paper over a splash of sunflower seed candies. Just a little treat with the comforts of home.


On an additional note, I brought my dog, Chiller, for a bath to be nice and clean for Christmas earlier in the week. I baked a batch of simple chunky cookies to bring to the groomers as a thank you and happy holidays. Here he is, surrounded by his toys, resting on his couch as usual.

Snickerdoodles --Martha Stewart

makes about 30

2 3/4 cups AP flour
2 tsp baking powder
1/2 tsp salt
1 cup unsalted butter, room temperature
1 1/2 cups plus 2 tbsp sugar
2 large eggs
2 tsp ground cinnamon

Preheat oven to 350. Sift together flour, baking powder, and salt into a bowl. Mix butter and 1 1/2 cups sugar in the bowl of an electric mixer fitted with the paddle attachment on medium speed until pale and fluffy. Mix in eggs and gradually mix in flour mixture.

Stir together cinnamon and remaining 2 tablespoons sugar in a small bowl. Shape dough into balls by combining two scoops from a 1 1/2-inch cookie scoop (4 tsp). Roll in cinnamon sugar and space 3 inches apart on parchment lined baking sheets.

Bake cookies, rotating halfway through, until edges are golden, about 12 minutes. Let cool on sheets on wire racks.

Thursday, December 22, 2011

banana-walnut chocolate chip cookies


Continuing my cookie baking bonanza, I made these wonderful banana-walnut chocolate chip cookies. They were deliciously right between chocolate chip cookies and banana nut bread. A great combination of flavors to package away as gifts.


I loved how these cookies called for wheat flour and oatmeal, making me feel just a bit better about all the buttery goodies I've been making and tasting. By adding the banana, the recipe called for less sugar than usual, which was another added benefit.


I packaged a box to send to A.'s office for her to share with her coworkers. The rest went into little cellophane baggies adorned with my Christmas craft this year of personalized felt gingerbread houses as a little Christmas gift to my college friends.

Banana-Walnut Chocolate Chip Cookies --Martha Stewart

makes about 3 dozen

1 cup AP flour
1/2 cup whole wheat flour
1 tsp salt
1/2 tsp baking soda
3/4 cup unsalted butter, room temperature
1/2 cup granulated sugar
1/2 cup packed light brown sugar
1 large egg
1 1/2 tsp vanilla extract
1/2 cup mashed ripe banana
1 cup old fashioned rolled oats
8 oz semisweet chocolate
1/2 cup chopped walnuts, toasted

Preheat oven to 375. Whisk together both flours, salt, and baking soda in a bowl.

Mix butter and both sugars in the bowl of an electric mixer fitted with the paddle attachment on medium speed until pale and fluffy. Reduce speed to low and add egg and vanilla, until combined. Mix in banana. Add flour mixture, mix until just combined. Stir in oats, chocolate, and walnuts.

Drop dough onto parchment lined baking sheets by a 1 1/2-inch cookie scoop. Space about 2 inches apart. Bake cookies, rotating halfway through, until golden brown and just set, 12 to 13 minutes. Let cool on sheets on wire racks for 5 minutes, and then transfer to wire racks to cool completely.

Wednesday, December 21, 2011

chewy chocolate gingerbread cookies


So I've deviated from the Hors D'oeuvres book lately because of the holidays, which is a season of baking to me. My house has been filled with the warmth of the oven and the smells of baked cookies a couple times each week this month. And as with the season of giving, I'd like to introduce the cookie recipes I'm going to share in the next few days leading up to Christmas. These are brand new recipes that I tried from an early Christmas gift from Audgbodge, the Martha Stewart's Cookies recipe book.


As part of our gift exchange, A. decided to flip through the book and earmark recipe requests. This was one of the first ones she requested as part of my holiday baking. I agreed that they looked quite delicious, especially since Martha Stewart referenced them first in the introduction of the book.


These were simple enough drop cookies spiked with a hefty amount of ginger, making them a much more sophisticated treat for adults. The strong ginger flavor was a surprise on the palette, adding a nice zing to the rich chocolate dough. My recipe made much more than expected, since I used a 2-tsp cookie scoop, and a bag was packed and given to A. to share with her coworkers.

Chewy Chocolate Gingerbread Cookies  -Martha Stewart

makes about 3 dozen

1 1/2 cups plus 1 tbsp AP flour
1 1/4 tsp ground ginger
1 tsp ground cinnamon
1/4 tsp ground cloves
1/4 tsp ground nutmeg
1 tbsp unsweetened Dutch-process cocoa powder
1/4 lb unsalted butter, room temp.
1 tbsp freshly grated peeled ginger
1/2 cup packed dark brown sugar
1/4 cup unsulfured molasses
1 tsp baking soda
1 1/2 tsp boiling water
7 oz semi-sweet chocolate, chips or 1/4 inch chunks
1/4 cup granulated sugar

Line baking sheets with parchment paper. In a bowl, sift together flour, ground ginger, cinnamon, cloves, nutmeg, and cocoa. In a bowl of an electric mixer with paddle attachment, beat butter and fresh ginger on medium speed until lightened. Add brown sugar and beat until combined. Add molasses and beat until combined.

In a small bowl, dissolve baking soda in boiling water. Beat half of flour mixture into butter mixture. Beat in baking soda mixture, and then remaining flour mixture. Mix in chocolate and turn onto plastic wrap. Pat to a 1 inch thickness and seal with wrap. Refrigerate until firm, 2 hours or overnight.

Preheat oven to 325. Scoop dough with 2 tsp cookie scoop and roll into a ball. Place 2 inches apart on baking sheets and chill for 20 minutes. Roll in granulated sugar. Bake until surface just begins to crack, about 10 minutes, rotating halfway through. Let cool for 5 minutes and then transfer to wire rack to cool completely.

Wednesday, December 14, 2011

pumpkin galore


I had a bunch of pumpkin puree left over from the Thanksgiving dessert, so I followed up with more pumpkin goodies the week after Thanksgiving. I made this pumpkin nut bread last year, and my coworkers really liked it. It was a nice change up from the normal banana nut bread.


The recipe is from the reliable Williams Sonoma, since they never fail me in offering up delicious recipes for tasting and testing. It was originally a pumpkin bread with dates, but I swapped the dates for toasted chopped pecans. As for the nut oil it called for, I substituted canola oil, which has a neutral flavor and won't take away or distort the bread flavor.


I used a pumpkin shaped cookie cutter to shape these thick slices of bread into cute little pumpkins. A small baggie was packed and left for my brother to taste.


Still left with some puree in my fridge, I continued on the pumpkin journey with cookies. This time I tried to clean my fridge of the remnants of Thanksgiving. There were fresh cranberries leftover from making cranberry sauce, so I oven dried them on a parchment lined baking sheet in a 275 degree oven. I hoped to mimic dried cranberries, but some of them bursted. Nonetheless, I added them to about half of the batter before baking.


The recipe once again was from Williams Sonoma, only with my tweaks. The original pumpkin cookies were iced and called for walnuts and raisins, but I opted out of icing, since I prefer my baked goods less sweet than most and swapped in pecans and cranberries. The results were pretty good for a first time try of the recipe. A's coworkers thought they were gingerbready, most likely a result of the ground ginger. The cranberries were actually quite sour, but worked well to balance the flavors of the cookies.

I can honestly say I've never had this much pumpkin, but it was nice to fill my house with the familiar smells of warm spices of the holiday season. I love busying myself in the kitchen, my favorite room of the house. I hope everyone has a little time to do their own baking to share with family and friends this holiday season.

Tuesday, December 6, 2011

thanksgiving dessert


As promised, here is the pumpkin mousse trifle that I made for Thanksgiving dinner. I was inspired by the wonderful way layered desserts look in a clear glass cup. The layers included vanilla sponge cake, pumpkin mousse, and crushed pralines. This was mine spin on a trifle for Thanksgiving. I kept the flavor profile simple, letting the three main components speak for themselves. Last year, I made Williams Sonoma's pumpkin mousse cake, which is quite similar, and where I drew the pumpkin mousse from.


I wanted a crunchier dimension to the cake, so decided to add crushed pralines, which worked well since pecans and pumpkin complement each other so well. It also gave me an excuse to finally use the Silpat that A. got me years ago. After the pralines cooled, I crushed in my food processor. I experimented a handful of times for the sponge cake, trying to achieve a light airy texture without the sticky top crust. I adjusted temperature, sugar, fat, and time, but still couldn't quite eliminate the problem of a sticky top crust after being completely cooled after baking. My final advice? Place a piece of parchment paper on the top after cooling and once ready to use, peel it off to remove the sticky crust.


I'll continually work on the sponge cake until I reach a perfect product, but until then, this recipe offers every quality a sponge cake should have, albeit with an added nuisance of a crust. My family loved this, and most surprisingly loved the praline, which I would have thought to be too sweet for their tastes. They actually sprinkled more on top as they devoured the cups. I served them with a hot cup of coffee and frothed milk, which was just a perfect way to end a holiday dinner.

Pumpkin Mousse Trifle
makes about 6 14-oz glasses (depends on the size of your glasses)

Praline - I used the praline recipe from Epicurious, and halved the recipe

Pumpkin Mousse - I used the whole recipe from this wonderful Williams Sonoma recipe

Sponge Cake
makes 1 half sheet

6 eggs, separated
2/3 cup baking sugar
1 cup cake flour, sifted
4 tbsp butter, melted
2 tsp vanilla
1/2 tsp cream of tartar
1/4 tsp salt

Preheat oven to 400. Line sheet pan with parchment paper.

Beat eggs yolks with sugar (but reserve 2 tbsp of sugar) until you reach the ribbon stage. Add vanilla.

Whisk egg whites until frothy. Add cream of tartar and salt. Continue whisking and once the whites start to thicken, sprinkle in reserved sugar and continue to whisk until you have stiff peaks. Fold a dollop into the egg yolk mixture to loosen it. Fold in remaining whites gently and fold in sifted flour. Lastly, fold in melted butter.

Be sure not to over mix and deflate the batter, since there are no leavening agents.

Bake until toothpick comes out clean, about 9 minutes. Cool on wire rack.

Assemble

Use the cup as a guide and cut out 12 circles of sponge cake.

Pipe a thin layer of mousse at the bottom of the cup. Place one circle of cake and gently press down to remove gaps of air. Pipe a layer of mousse on top, matching the thickness of the cake. Sprinkle with crushed pralines. Repeat starting with cake. Finish with a final layer of piped mousse, pipe extra to crown the cup just a bit. Use a knife or spatula to cut off extra mousse, leaving the mousse clean and flushed with the edge of the glass.

Refrigerate until set and up to overnight. Take out of refrigerator about 20 minutes before serving to bring it back to cool room temperature.

Tuesday, November 29, 2011

thanksgiving


I hope everyone had a wonderful Thanksgiving weekend. It is the official start of the holiday season, and my favorite time of year. As with the recent years past, I've been passed the torch to all holiday meals. My menu this year included the usuals as requested by my brother, brussels sprouts, cranberry sauce, and risotto. I originally planned a roasted butternut squash risotto, but it was changed back to my popular mushroom risotto of the past few years. I added chipotle sweet potatoes as a side, since my mom bought them earlier in the week. And of course, we had the showstopper turkey with gravy.


I've had great success with Alton Brown's Good Eats Turkey last year, so it was back by popular demand. It completely merits the rave reviews and thus I must thank Audgbodge again for referring me to the recipe. I added a layer of mirepoix with a can of low sodium chicken stock below the turkey when roasting. Although not part of the original recipe, my family always liked the extra vegetables, so I figured why not. Plus, it added moisture while roasting, which was nice.


I watched the Food Network Thanksgiving specials this year and noticed that Alton Brown dry-brined his turkey, which was interesting, but call me old fashioned when I say that I love the way a whole turkey looks on the carving board with everyone hovering over it. So, I stuck to his old recipe but decided to try his new gravy, which just became a new yearly request. The only thing was that I disgarded the giblets after the stock was made. I must say it was the best gravy ever, rich with turkey flavor, slightly spiced with herbs, and utterly delicious.


My brother loved the gravy so much that he refused to give it up when we were packing leftovers. Since he's the only one that likes cranberry sauce, I asked if that meant I didn't need to make it especially for him anymore. He insisted that he still likes the cranberry sauce but also thinks the gravy is really something special.


They loved the mushroom risotto, noting that it was better this year. I undercooked it a bit on purpose, knowing that it will continue cooking in the hot pot waiting to be plated. Our plates were full of food and we had to rest over an hour before we had dessert. I made my own spin on Williams Sonoma's pumpkin mousse, turning it into a trifle, but more on that and other things pumpkin later.


And here is our king of the house, asleep from his Thanksgiving dinner of chicken breast, broccoli, and kibble, equipped with his gobble gobble bandana.

Tuesday, November 22, 2011

pissaladiere


According to the recipe, this dish for Provencals is equivalent to pizza for New Yorkers. It carries similar toppings of tomatoes, onions, and olives for a simple vegetarian pizza, but the crust is buttery and flaky. Most of the components are definitely a do ahead if you wish to serve this warm for an appetizer and save time for the entree.

I oven dried the tomatoes with some minced garlic, salt, pepper, and olive oil at 400 degrees for about half an hour so that the tomatoes slightly resemble sun dried. The onions should also be caramelized ahead of time, especially since it is a low and slow process. The puff pastry puffs up quite a bit, more so than I expected considering all the fork pricks, but the filling weighs it back down into a thinner crust leaving the sides like a little wall.


This was a savory little bite, with the anchovies coming through with a depth of flavor. The acidity of the tomatoes cuts through some of the sweetness of the onions and the buttery pastry. I would just suggest cutting the olives into quarters rather than halves, because they were a bit large even when compared to the tomatoes.

Pissaladiere

makes one puff pastry tart

3 garlic cloves, minced
2 large onions, sliced and cut into 1/4-inch-thick
1/2 tbsp fresh thyme, plus 4 sprigs for garnish
1/2 bay leaf
6 anchovy fillets, finely chopped
AP flour for dusting
1 sheet puff pastry, store bought and thawed
1 egg, lightly beaten for egg wash
10 cherry tomatoes, oven-dried
16 black olives, pitted and quartered
sea salt
pepper
olive oil

Heat olive oil in large skillet over medium heat. Add garlic and cook, stirring occasionally, until lightly browned. Increase heat to medium-high and add onions, stirring every 5 minutes, until slightly golden, about 20 minutes. Reduce heat to low, add thyme and bay leaf. Cook, covered, stirring occasionally, until very soft and caramelized, 20 minutes. (Add a few tablespoons of water if pan sticks). Remove bay leaf and stir in anchovies. Season to taste.

Preheat oven to 400. Line a baking sheet with parchment paper. On a lightly floured surface, roll out sheet of puff pastry to a 10 x 14-inch rectangle. Trim 1/2-inch-wide strips from each side. Brush edges of rectangle sheet with egg wash and place the trimmed strips along the edges to form a small wall. Prick the base of the dough all over with a fork. Brush egg wash all over. Chill dough in the refrigerator for 20 minutes. Bake until golden and fluffy, 10 to 15 minutes.

Scatter onions, tomatoes, olives, and sprigs of thyme on tart. Return to oven to warm. Cut tart into small squares and serve warm.

Sunday, November 13, 2011

tuna nicoise baguette


I've been meaning to make a tuna nicoise sandwich ever since I saw it on an episode of America's Test Kitchen with A. The only problem was that it called for a few canned items my pantry always lacked. So when the Hors D'oeuvres book had a recipe, I just had to stop by the market to finally try this spin on a classic French salad.


I've made vinaigrettes before for salads, but the achieving the emulsion for this dressing was so surprising. It literally took only a few seconds for the white wine vinegar to thicken with the olive oil and form a light yellow and creamier consistency. Be sure to taste the dressed tuna, since it was the major ingredient seasoned.


I have to admit being a bit greedy with the filling, which looked overflowing even as an open faced sandwich. It became dinner and lunch, but for the first round, my tomatoes were simply sliced fresh. For the second round, I roasted the tomatoes with some garlic, salt, pepper, and olive oil. The roasted tomatoes definitely made a difference in flavor, and worth the hour of roasting. The sandwich was a nice balance of salty bite from the anchovies and tangy burst from the capers. The tomatoes imparted a nice smokiness and the egg yokes added a creaminess. I felt like this was a sandwich from a Parisian cafe.

Tuna Nicoise Baguette slightly adapted

1 large egg
1 tbsp white wine vinegar
2 1/2 tbsp extra-virgin olive oil
3 flat anchovy fillets, finely chopped
1 tbsp capers, drained and rinsed
1/2 medium shallot, grated
1 can chunk white tuna, drained and flaked
1 fresh baguette
baby spinach
5 oz plum tomatoes, cut into small wedges and oven dried (see below)
2 oz black olives, chopped
sea salt and pepper

Place egg in small saucepan covered with cold water. Bring to boil on medium heat and turn off heat. Time for 10 minutes and drain and rinse under cold water. Peel and slice.

Add vinegar to stainless-steel bowl. Slowly whisk in olive oil until emulsified. Add anchovies, capers, and shallots. Add tuna and toss. Season with salt and pepper.

Split baguette lengthwise without cutting all the way through and fold open. Arrange the spinach leaves on one side and top with tuna and sprinkle with olives. On the other side, line with tomatoes and egg slices. Close and cut into 2 inch sandwiches.

Note: Roast tomatoes in a 400 degree oven for about an hour or until skin starts to shrivel. The tomatoes are tossed with olive oil, salt, pepper, and 2 minced garlic cloves.

Monday, November 7, 2011

sponge cake with crispy layers


As I promised in the last post, here is the update on using up the phyllo dough. This was inspired by a pretty simple Chinese bakery cake standard. The baked goods I grew up on were more similar to this than the all American fare I experiment these days.

Unfortunately, I wasn't able to find a recipe specifically for this application, so I used a basic vanilla sponge cake recipe and slightly sweetened whipped cream, both from Williams Sonoma. As for the phyllo dough, I went through a trial and error. The cake from Chinese bakeries have a relatively dry crispy layer center, so I baked off the phyllo layers straight from the fridge in a stack. That did not work out, since the edges curled and the results were overly dry and left a dusty flour taste on the palette. In order to get the layers golden brown and flat, I brushed each layer with some melted butter, similar to the approach used in the last post with the exception of sugar.

Flavor speaking, this was quite close to the ones from bakeries. The only downfall was the texture from the sponge cake, which was much less fluffy. The ones from bakeries have cake layers that are much taller. I'm thinking that if the cake was baked in a cake pan, rather than a sheet pan, with more batter, I would get a similar effect. Otherwise, this was a quite a replication success.

Tuesday, November 1, 2011

apple strudel


I made this a while ago and never got the chance to post it. This along with a Sponge Cake with Crispy Layers, which I will post later, were made in an effort to use up my phyllo dough. The frozen phyllo came in a two pack with enough layers to make plenty of these.


The original recipe called for dried mixed fruits, but I didn't want to buy any and decided that if the filling was just apples, it would taste more like a small crispy apple pie. Be sure to use only apples good for baking, such as tart Granny Smiths or Fujis (which I used). The crispy texture will hold up well while baking.


The results remind me a bit of the individual apple pies from McDonald's, only with a crispier, flakier, less buttery crust. It provides enough cinnamon-y sweet flavor without the guilt of a butter laden pie crust.

Apple Strudel adapted from Williams Sonoma

makes 8 servings

14 sheets phyllo dough, thawed
1/2 cup unsalted butter, melted and cooled
8 tsp granulated sugar
2 large Fuji apples, peeled, cored, and diced
1/2 cup firmly packed brown sugar
1 tsp ground cinnamon
1/2 tsp ground nutmeg

Preheat oven to 375. Line baking sheet with parchment paper.

Working with one phyllo sheet at a time, place the first sheet on the parchment paper. Brush well with some of the melted butter. Lay a second sheet on top and brush again with butter. Sprinkle with 1 tsp of granulated sugar. Repeat, brushing every sheet with butter and sprinkling every other sheet with 1 tsp of sugar.

Toss together the apples, brown sugar, cinnamon, and nutmeg. Arrange the apple filling along one long side of the phyllo stack, positioning it about 1 inch from the edge. Fold the edge of the stack over the filling, then roll up the phyllo into a log with the seam side down. Brush the log with butter and sprinkle the remaining 1 tsp sugar.

Bake until the phyllo is golden and the apples are tender when pierced with the tip of a knife, 45-55 minutes. Cool on pan on wire rack for 30 minutes.

Saturday, October 29, 2011

grilled zucchini canapes


As I mentioned in the last post, I made some Swedish rye bread. I actually tried to adjust the bread's ingredients to make a sweeter, more like pumpernickel, flavor. Unfortunately, it did not taste exactly like I wanted, which made me want to tweak the recipe some more. I will update once those trials happen. But anyways, I found myself with two loaves of bread needing a purpose. These canapes were a solution, since they actually called for a pumpernickel bread.

Roasting the peppers were really easy, nothing to be intimidated by. I just placed them directly on the trivet of my stove over medium-high heat. It will start to blister and may even pop slightly, but that's quite all right. Turn to char all sides and once completely blackened, place in a bowl covered by plastic wrap for 15 minutes. The steam will loosen the charred skin for easy removal. Remove the skin, core, and seeds.


Got to use the mandoline from E. again, I love it, one of my new favorite kitchen supplies. Makes thin slicing easier than boiling water. I wish I had this little wonder when I made potato crusted halibut last year. Had to make paper thin slices of potatoes with my chef's knife, not necessarily a task for a novice. Anyways, I was in no way about to take out the outdoor grill for a few zucchinis, so I just used my electric George Foreman grill. Worked completely fine and I'm sure the grill pans for your stove will work perfectly as well.


These were pretty good for being basically all vegetables. Make sure you season generously as mine came out a bit bland. The roasted flavor comes through nicely and the peppers added a slight sweetness. I think I would have liked to add a slice of prosciutto or smoked ham, or if adjusted for a lunch portion a piece of grilled chicken. Nonetheless this was a nice change in how sandwich components are perceived.

Grilled Zucchini Canapes

makes 2 dozen

1 small eggplant (10 oz)
2 1/2 oz feta cheese
12 1/4-inch-thick slices of pumpernickel bread
6 oz baby zucchini or 2 6 oz zucchini
2 large roasted red bell peppers
sea salt and pepper
olive oil

Preheat oven to 400. Place whole eggplant on baking sheet and roast until the skin buckles and the flesh is cooked throughout, 30-40 minutes. If using a larger eggplant, cut in half and place cut side down. Scrap cooked eggplant into food processor and process until as smooth as possible. Set aside to cool. Crumble in the feta and process until blended. Season.

Reduce oven heat to 300. Toast bread slices on baking sheet, about 5-7 minutes per side. Cut into 2 1/2 by 3 inch pieces.

Slice zucchini lengthwise into 1/8-inch-thick slices using mandoline. Heat grill. Brush zucchini with olive oil and grill until light grill marks appear.

Cut roasted peppers into about 2 1/2 by 3 inch pieces. Spread each bread slice with eggplant puree. Place a roasted bell pepper over the puree and arrange zucchini slices on top, parallel with the short end of the bread. Trim crusts and cut each piece into 2 rectangles.


Friday, October 21, 2011

bread, bread, and more bread


I love bread. Everything from basic baguette to Chinese sweet taro buns...there's no discrimination. When Starbucks started marketing their sandwich line, I remember reading an ad in a magazine where no coffee was mentioned at all and the entire blurb was dedicated to the awesomeness of bread. I agreed wholeheartedly.

In the past two weeks, I found myself going through bread flour and yeast, waiting for batches to proof and rise, and filling my house with the unmistakable smell of baked goods. And of course, the results became breakfast for my mom and I, thank goodness she shares the same fondness for bread as I do.


First up...a cinnamon raisin bread. A great flavorful and moist bread for breakfast, simply toasted with a bit of butter was how we enjoyed it. A thick slice was bagged for A., who had her eyes on the brown sugary corner; something unintended for, but I guess at least she liked. My mom liked it so much, she gave me one of the best critiques, "You could sell this." I laughed and ate more bread. I baked a mini version (the lower left picture), which resulted in the cutest iconic bread slice (center right) with its overhanging domed top.


Up next...a Swedish rye bread with my own spin. I wanted to create something similar to a dark squaw or dark pumpernickel bread, but as a first attempt, this fell a bit short. The rye flour was definitely noticeable, giving the bread a distinctive taste. I'm going to experiment some more, possibly by adding more molasses, some unsweetened chocolate, etc. to create a flavor I recall from a restaurant that closed a few years back.


And last but not least...banana nut bread. I had some very ripe bananas, so my mom asked for banana nut bread. Quite a simple recipe, which was great, especially since it called for 3 bananas unlike another recipe I used before that called for 6. I substituted regular milk with a bit of lemon juice for buttermilk, and the results were undetectable. The only thing that I distinctly remember liking more from the 6 banana recipe was the sugary crust, which can be easily added to this recipe by sprinkling a few teaspoons of sugar on top right before baking.

All of the above recipes were from my Williams Sonoma Baking Book, a collection I turn to all the time to find inspiration.

Happy bread eating!

Wednesday, October 19, 2011

sea scallops with pea puree on potato chips


It took me a while to figure out which recipe to make next from the Hors D'oeuvres book, especially since my fridge was near empty. I recently went to a girls night out dinner in celebration for audgbodge's birthday. One of the main courses was a sea scallop with risotto, which was delicious and tempting to re-create. So, I decided to buy some scallops, which worked out well for this recipe. More on the re-creation later.


I was missing a few flavoring ingredients, so naturally I made substitutions. I had some celery stalks, which I used to replace the leeks in the pea puree. Although celery doesn't have the mild onion flavor of leeks, it enhanced the sweetness of the peas. Basil was also used in place of mint, which worked out well with the sweetness of the puree.


These little one bite wonders were perfect. Pricey considering that two bites require one scallop, but worth it if serving as a small appetizer for a nice intimate dinner. The slight char of the scallop worked well with the sweetness of the pea puree, and its supple meatiness contrasted well with the crisp of the chip.

Sea Scallops with Pea Puree on Potato Chips adapted

makes about 2 dozen

1 garlic clove, minced
1 shallot, finely chopped
2 small celery stalks, thinly sliced
1 cup frozen peas, thawed
2 tablespoons water
1 tablespoon basil, chopped
12 medium sea scallops, sliced in half crosswise
24 potato chips (choose one that is light in flavor)
olive oil
sea salt and pepper

Heat oil over low heat, add the garlic, shallot, and celery. Add salt and pepper to sweat. Cook until very soft but not browned, about 8 to 10 minutes. Add the peas, raise the heat to medium, and cook, stirring, until the peas are cooked through.

Transfer half the pea mixture to food processor. Add the water and 1/2 tablespoon of oil. Pulse until the mixture is a course puree, about 20 pulses. Transfer to medium bowl. Process remaining half of the peas until smooth. Stir into the coarsely pureed peas. Add chopped basil and adjust seasoning to taste.

Heat tablespoon of oil over medium-high heat. Season scallops with salt and pepper. Add to hot pan, searing until golden brown, 1 to 2 minutes per side.

Place 1 teaspoon of pea puree on each potato chip and top with a scallop. Serve immediately.